Spatial Recovery — Stages 3–5
 Spatial recovery comparison (Mission Kill) — 16mm Positive Print vs. 35mm Internegative vs. Machine Learning Result.
Prerequisites: Complete Stages 0–2 first (Resolve export, Nuke setup, dataset curation, alignment, shared crop).
Status: experimental. This branch is under development and not presented as a finished archival-ready workflow. Treat it as research context.
 Proof of concept (El Tinterillo): 16mm Print vs. Telecine vs. ML spatial transfer in both directions. Results show potential but also typical artifacts — edge inconsistencies, grain structure mismatches, and detail hallucination — illustrating why this branch remains experimental.
This guide covers spatial-specific target construction, training, inference, and validation. The model learns to transfer spatial characteristics (resolution, grain, sharpness) from the reference while preserving source chroma.
When to Use Spatial Recovery
- Detail loss from physical damage, generation loss, or nitrate decay
- Gauge-related quality differences (16mm vs. 35mm)
- Generational degradation (print → duplicate → internegative)
- Multiple sources with varying spatial qualities requiring homogenization
- Partial damage where telecines or alternate sources preserve better spatial information
Traditional spatial filters (sharpen, blur, interpolation) operate within same or neighboring frames — they cannot learn spatial features from external references.
Common Source Scenarios
- Multiple film gauges (16mm vs. 35mm)
- Different generations (print, internegative, duplicate)
- Early preservation elements (telecines, safety copies made closer to original)
- Multiple prints/scans of varying quality
Stage 3: CopyCat Training — Spatial Target
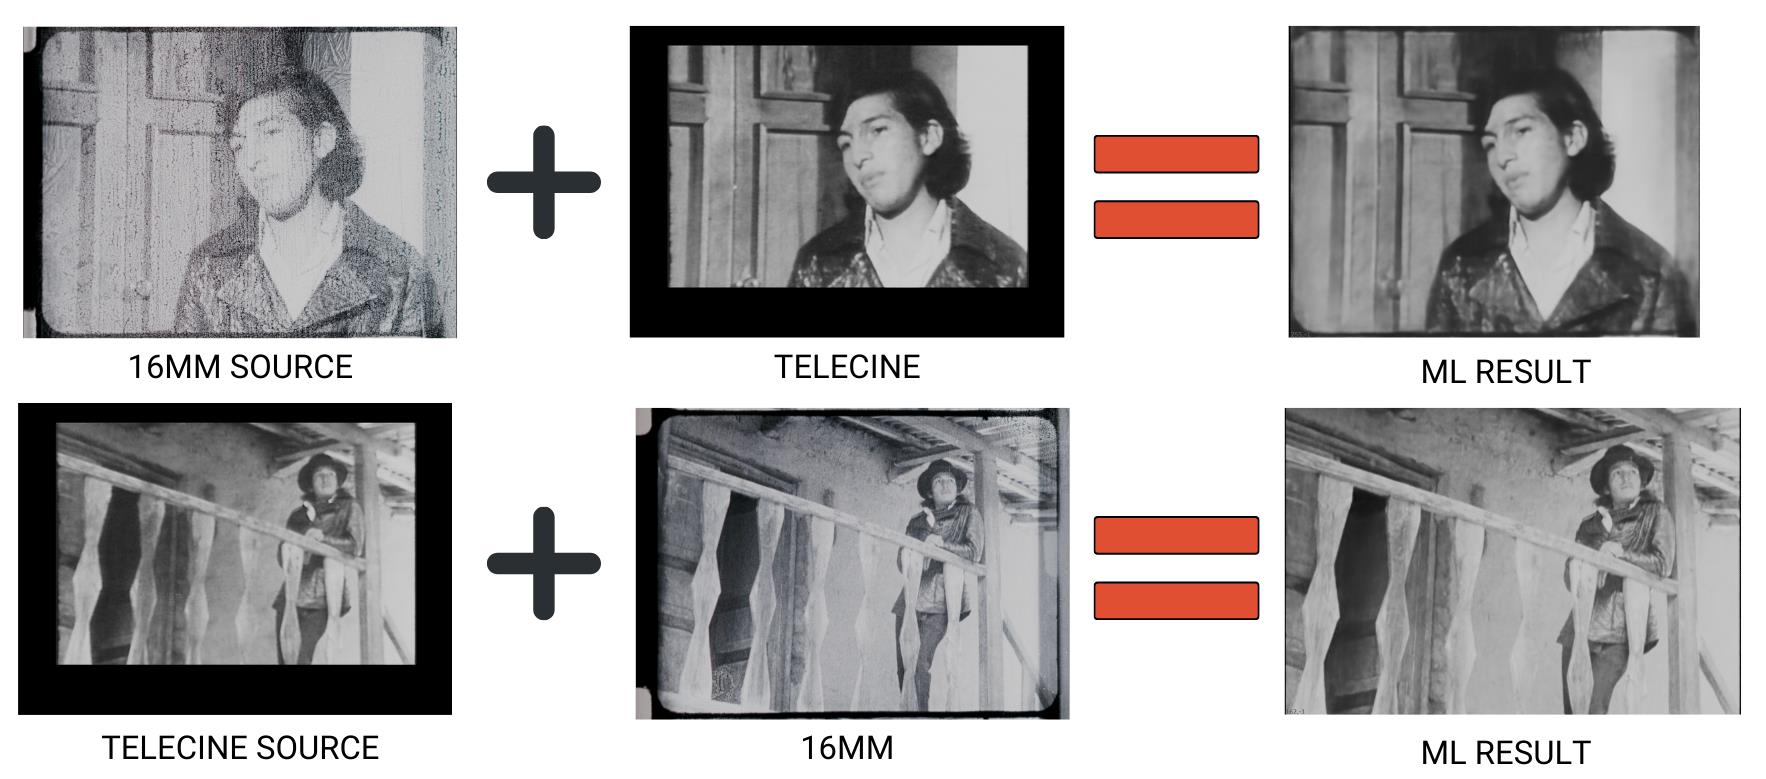 Training diagram (El Tinterillo): bidirectional spatial transfer between 16mm and Telecine sources. Source + Reference = ML Result in both directions.
Training Pair Build
- Source pre-filter (optional, use with caution): If Source has severe compression artifacts or jagged edges, a very light
Median(size 3–5) may be applied to Source only. Critical: if you preprocess Source during training, you must apply identical preprocessing during inference. In most cases, avoid filtering entirely. Do not median/blur the Reference — preserve all spatial detail. - Apply linked Crop to Source: clone/link the Stage 2 Reference
Croponto Source. Do not add a new Crop to Reference. BBox parity enforced in step 8. - Convert both branches to YCbCr:
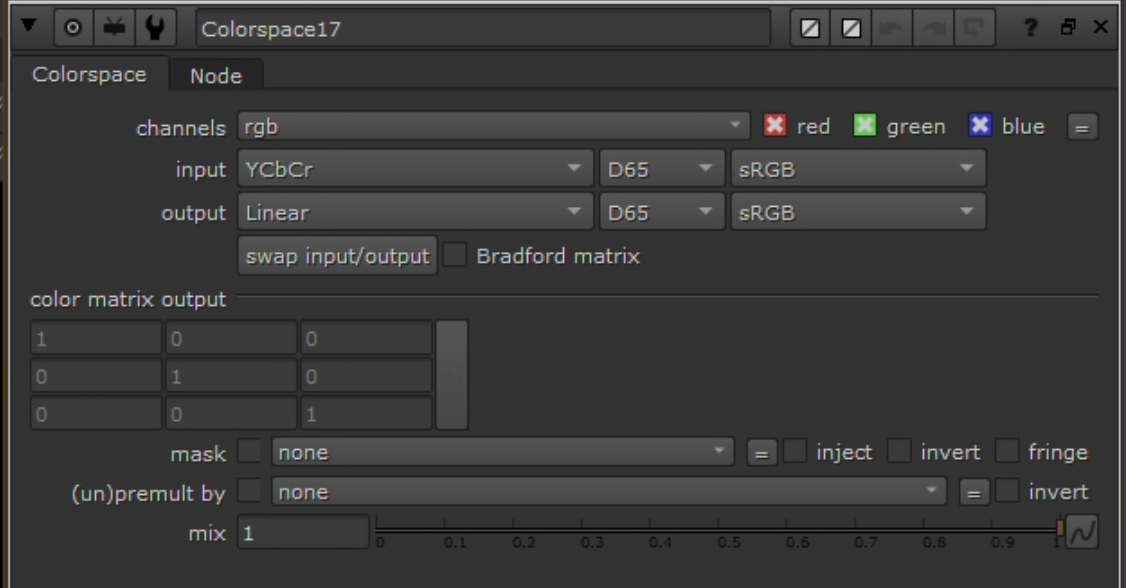
Colorspace(Working → YCbCr).
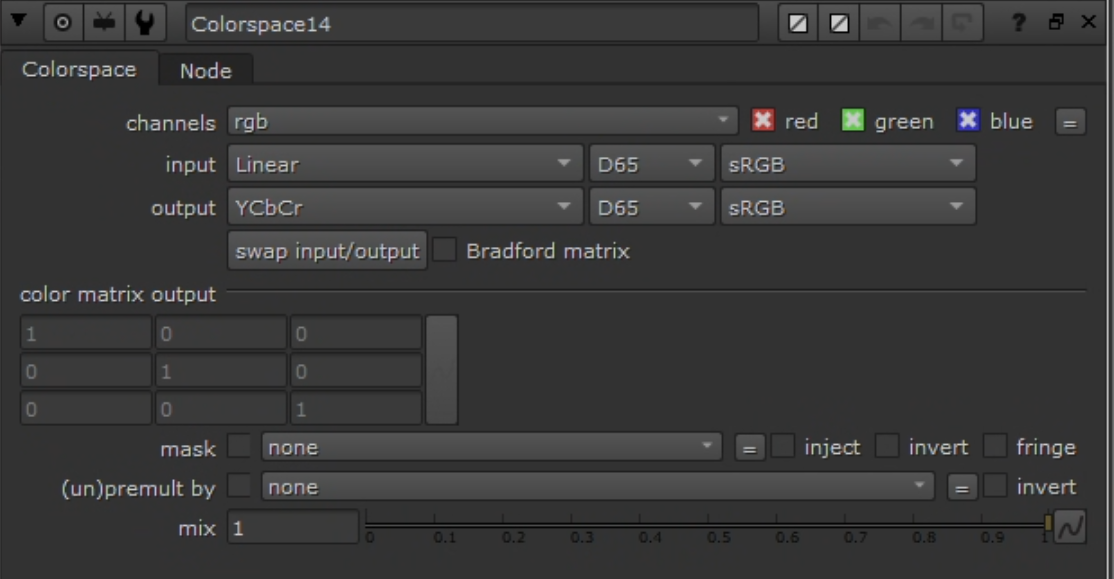 Colorspace node: Linear → YCbCr.
- Build ground truth with
Shuffle:- Goal: Ground Truth = Reference luma (Y) + Source chroma (Cb/Cr).
- Inputs: A = Reference (YCbCr), B = Source (YCbCr)
- YCbCr packing in Nuke: red = Y, green = Cb, blue = Cr
- Channel mapping:
- red ← A.red (Y from Reference)
- green ← B.green (Cb from Source)
- blue ← B.blue (Cr from Source)
- alpha ← black
 Shuffle: Reference.Y + Source.CbCr — the inverse of the chroma recovery Shuffle.
- Convert ground truth back:
Colorspace(YCbCr → Working).
 Colorspace node: YCbCr → Linear (reverse conversion on Ground Truth).
- Clamp:
Gradeon both Input and Ground Truth — enable black/white clamp to [0–1]. - Remove alpha:
Removenode to drop alpha on both. - Copy bbox:
CopyBBox/SetBBox— copy bbox from Reference to Source and Ground Truth. - Connect to
CopyCat: Input = Source (post clamp/remove/bbox), Target = Ground Truth (post clamp/remove/bbox). Only luma differs.
Hyperparameters
Same as chroma recovery — see chroma-recovery.md hyperparameters for the full table. Key values: Medium model, Patch 512, Batch 3, 40–80k steps.
Augmentations
- Geometric: small translate/scale; horizontal flip if composition allows. Avoid rotation if alignment is tight.
- Photometric: mild exposure jitter (±0.1). Avoid transforms that alter spatial characteristics (no sharpening, blurring, or grain synthesis).
Preview Input
Same approach as chroma — use a frame not in the training dataset with representative textures/edges. Monitor at each 10k checkpoint.
Monitoring
- Track loss progression; observe contact sheets.
- Chroma identity: convert both to YCbCr, difference Cb/Cr — expect near-zero.
- Range: confirm clamping prevented <0 or >1 values.
- BBox: confirm identical bbox on both streams.
See chroma-recovery.md monitoring for CopyCat Progress tab screenshots (contact sheet and preview views). The UI is identical for both branches.
Stage 4: Inference and Render
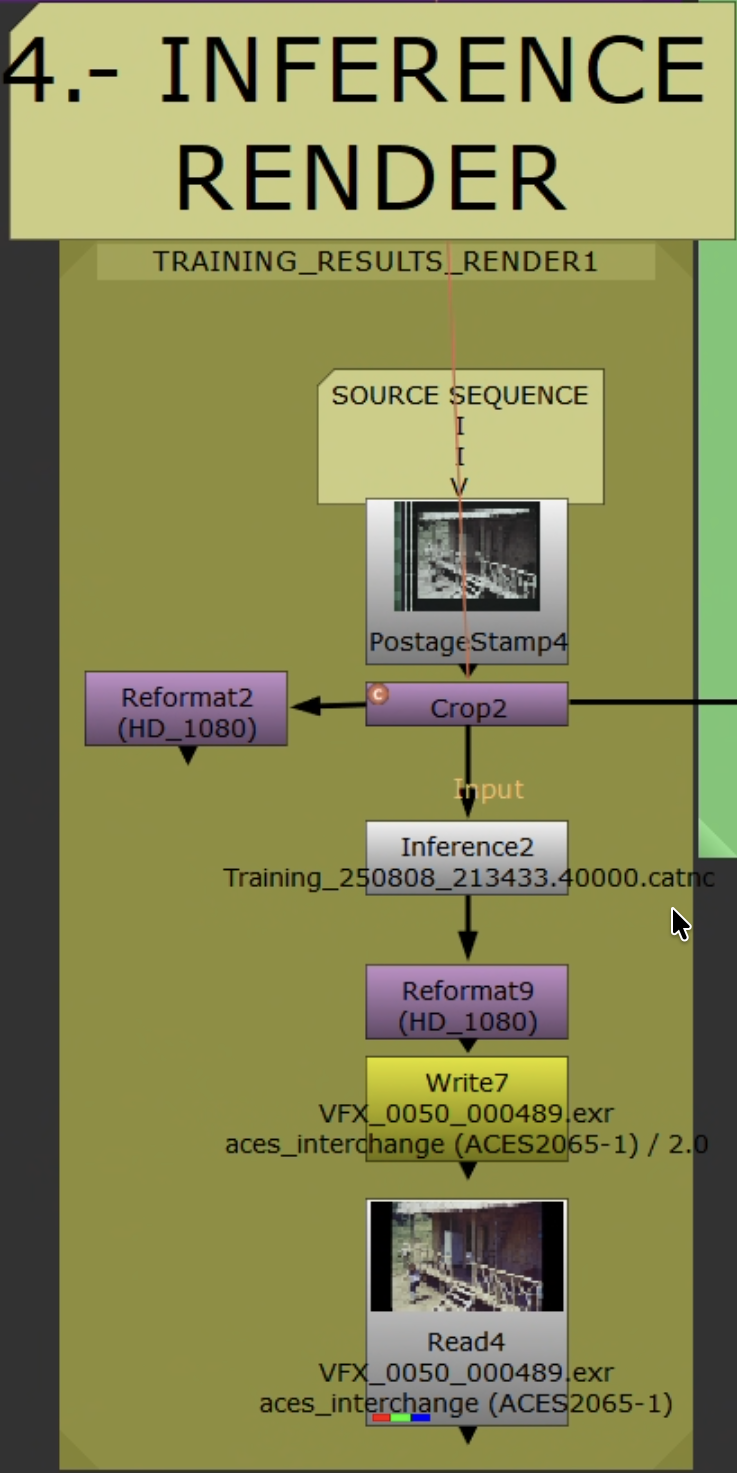 Inference workflow applying trained model to full sequence.
Steps
- Read original Source. Set
Read.colorspaceto match training ingest domain. - Apply identical Source preprocessing from Stage 3 — if you used any (e.g., light
Median), apply the exact same here. If none was used, skip. - Add live-area
Crop. Ensure picture area matches training. - No color space conversion needed. The model maps Source → (Reference.Y + Source.CbCr), so it preserves original chroma while improving spatial detail. Feed Source as-is after preprocessing/crop.
Inferencenode: load trained.catmodel. Same patch/tiling as training.- Convert to delivery space. Reformat/pad as needed.
- Validate on 50–100 frames first.
Output and Render Settings
Same as chroma recovery — see chroma-recovery.md render settings. EXR 16-bit half, ACES 2065-1.
Outlier Review and Iteration
- Scrub rendered range. Flag: over-sharpening, halos, grain inconsistency, flicker, edge artifacts.
- Add flagged frames as new pairs. Update
AppendClip; keep held-out validation frames. - If artifacts are localized, confirm
Cropexcludes them. Refine Reference cleanup (dust/scratch removal only — no median/blur on Reference). - Retraining: increase pairs (4 → 7 → 11) targeting missing texture/edge families. Extend steps. Reduce photometric augmentations if unstable.
- Retrain, re-infer short range, iterate.
QA
- Check first/last frames and shot joins.
- Spot-check fine textures, sharp edges, smooth gradients.
Stage 5: Validation
Resolve Validation
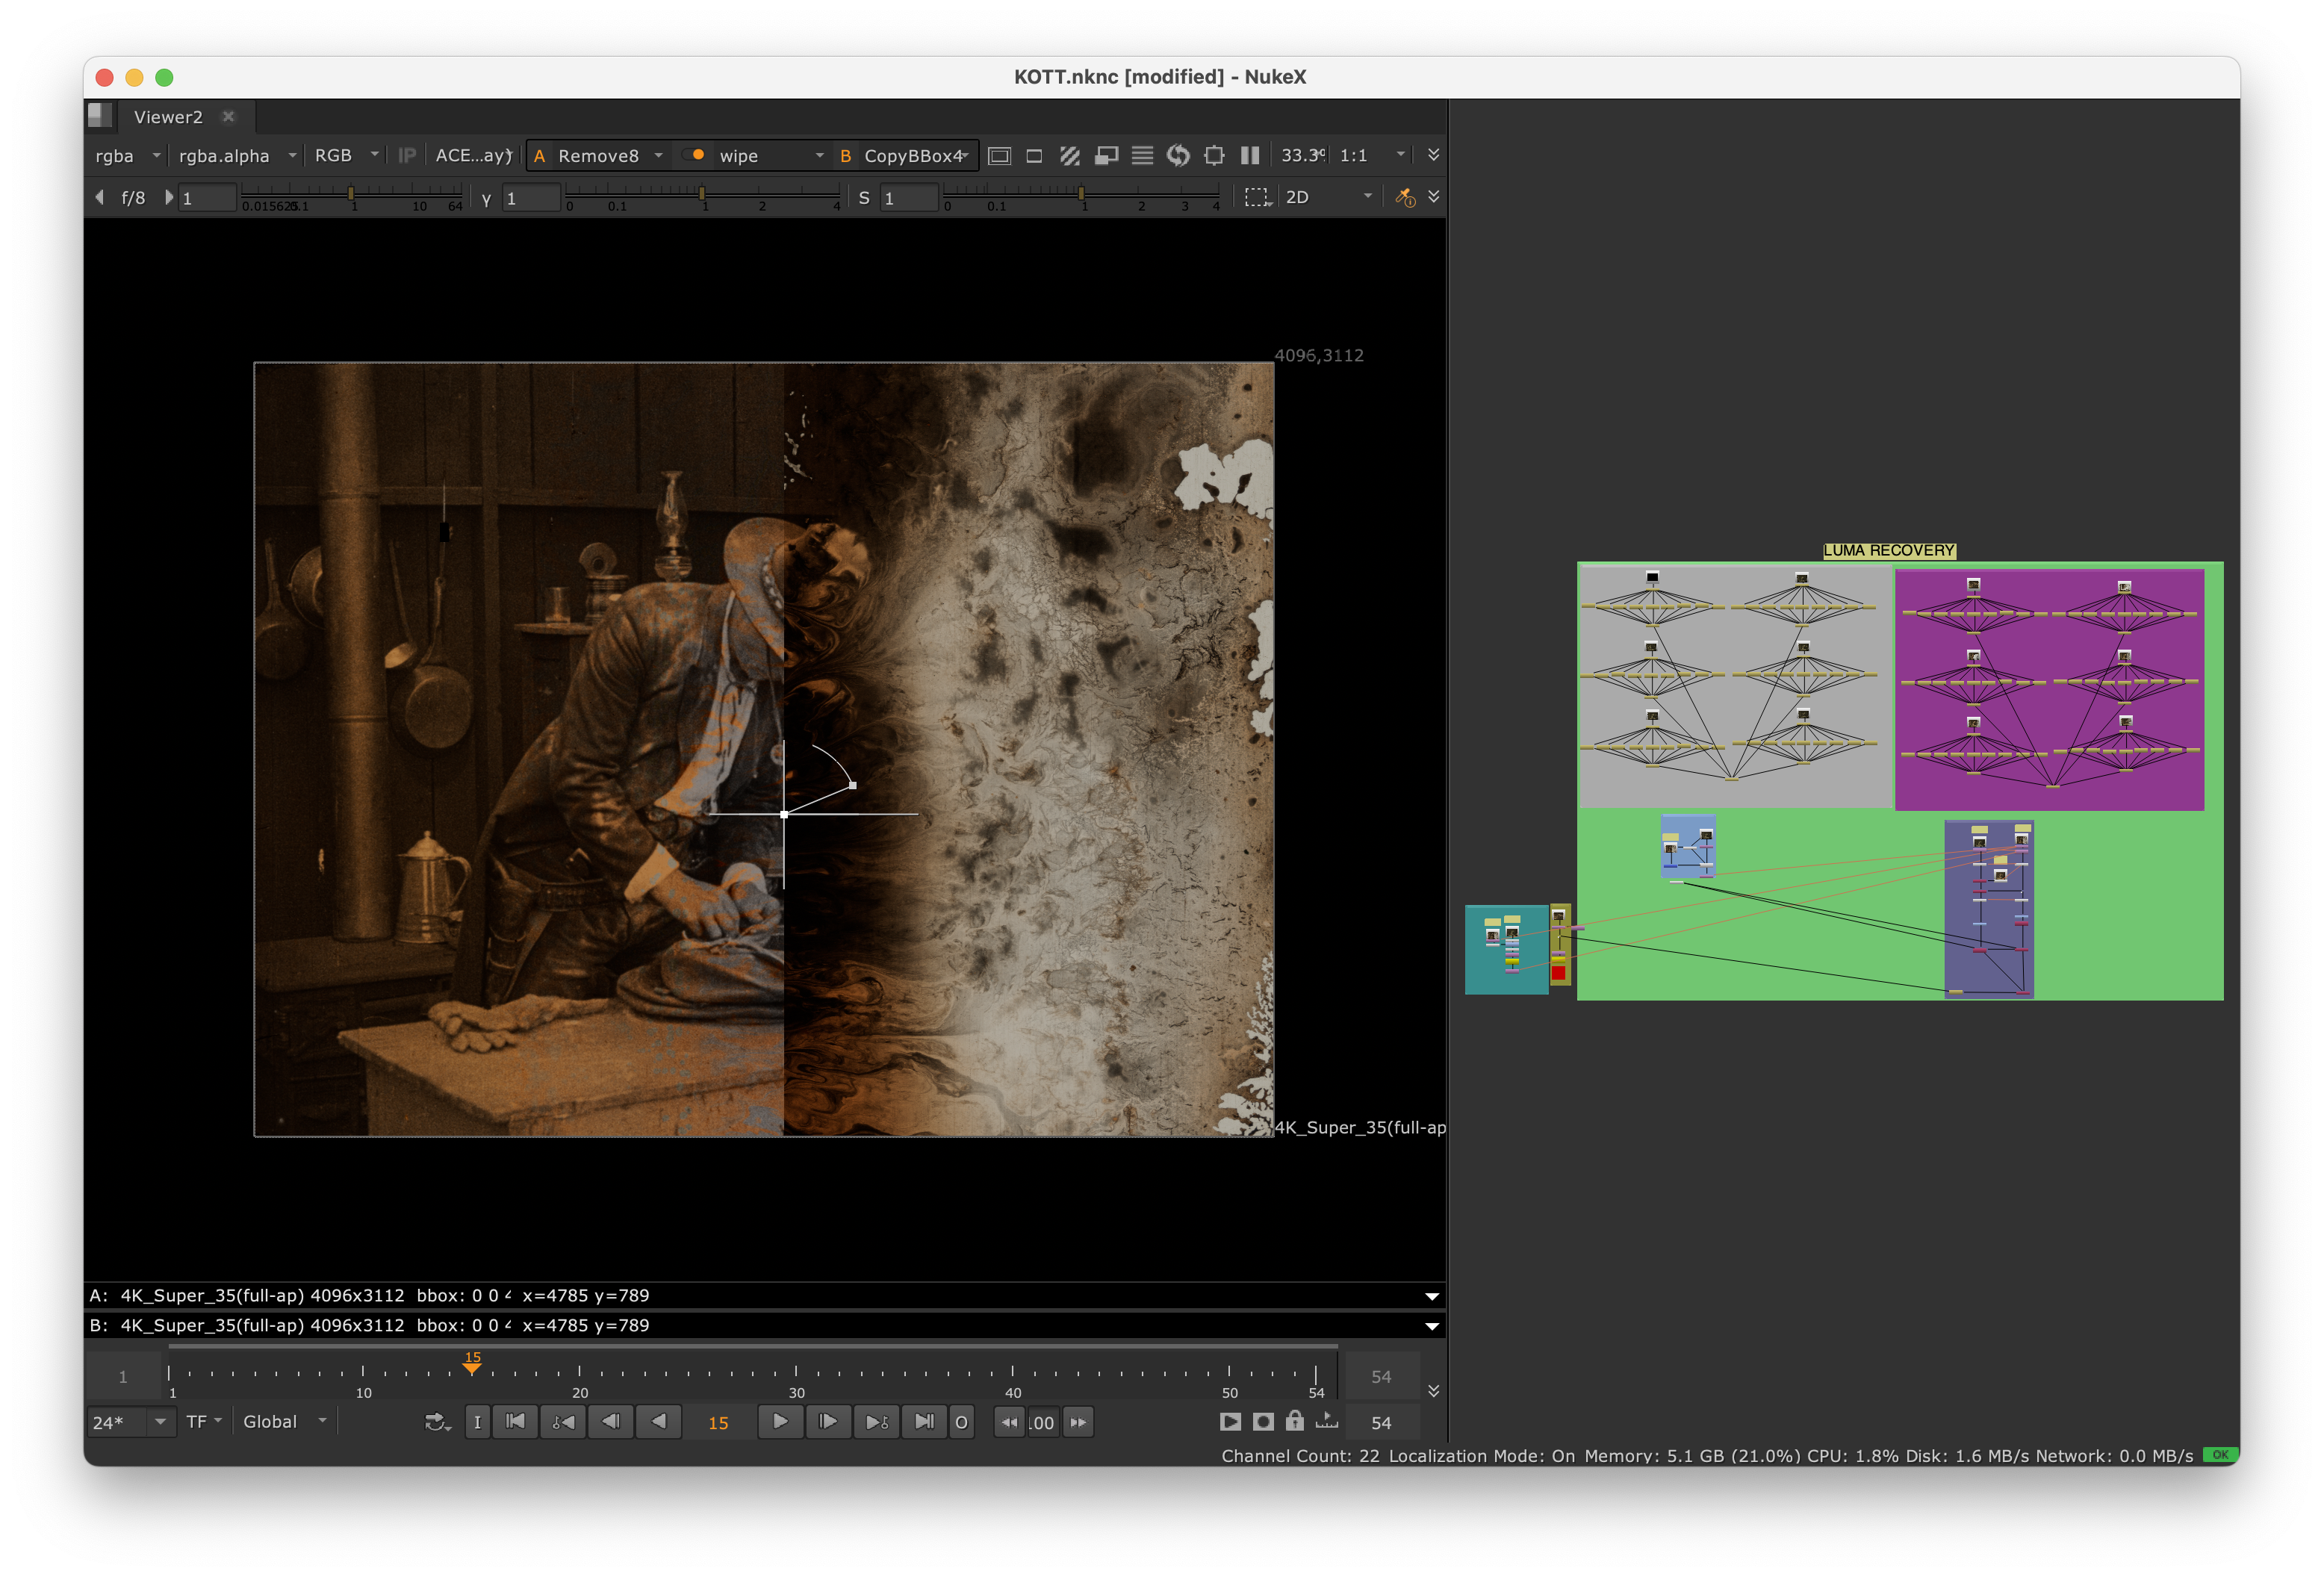 Nuke viewer wipe (Knights of the Trail): original source (left) vs. spatial recovery output (right). Compare detail, grain structure, and edge definition.
- Import Original and Recovered into the same ACES-managed Resolve project.
- Stack, align, disable grades.
- Viewer wipe / split-screen / toggle visibility.
- Scopes: waveform (Y) for improved luma detail/resolution; vectorscope for chroma (should match original — chroma is preserved by design).
- Note outliers for Stage 4 iteration.
Resolve Composition (Spatial Merge)
Integrate improved spatial detail while preserving original color:
- Edit page: Recovered on V2 above Original on V1. Set V2 Composite Mode =
Luminosity. - Color page: Layer Mixer, Composite Mode =
Luminosity(Recovered over Original). - Keep ACES-managed. No additional grades.
Acceptance Criteria
- Sharper edges, better grain structure, improved detail retention.
- No temporal artifacts (flickering, inconsistent grain).
- Color preserved — no unintended shifts.
- No over-sharpening or halos.
Delivery
- Save model/checkpoint ID, dataset indices, validation stills.
- Deliver EXR masters + validation note (source types, spatial quality assessment, caveats).
Troubleshooting
| Problem | Solution |
|---|---|
| Residual misalignment | Switch to keyed Transform. See Stage 2. |
| Convergence stalls | Add pairs covering texture families (fabric, foliage, skin, edges, extremes). Extend steps. Reduce photometric jitter. |
| Over-sharpening or halos | Reduce total steps. Decrease patch size. Verify reference has superior spatial quality without artifacts. Check YCbCr channel swap. |
| Flickering / inconsistent spatial quality | Expand pair coverage near lighting transitions. Re-evaluate crops. Check alignment consistency. |
| Grain structure mismatch | Verify reference grain characteristics. Add more textured frames. Ensure reference has superior grain. |
| Detail loss | Ensure ground truth uses Reference.Y. Verify Shuffle: Reference.red → Ground Truth.red. Reduce model complexity if overfitting. |